I love reading books. Have I ever mentioned it before? I used to be an avid reader but somehow in the course of time I have reduced my reading drastically. Not intentionally but it just happened. I had a dream yesterday about getting locked up in a library and I spent the rest of the dream- you guessed it right- Reading! Yes, you read it correctly, I DREAMT about reading! So, I'm gonna get back to my reading habit. I have atleast 6 novels in my shelf that I'm yet to even touch. Anyone willing to join me in this marathon, please do :D As I was browsing for more books to buy(!), I realized I never posted the pics for a cake I made 3 weeks back. So here we are.

I have seen so many upside down cakes doing the rounds and it intrigues me every time but somehow never made one myself. So when this cake was chosen for one of the bake-alongs I was convinced to bake it. These are the kinda cakes that need no frosting. The sweetness is provided by caramel, on top of which the fruits are arranged. The batter is scooped up on top of the fruits and baked. Once baked, the pan is turned and the caramel soaked fruits are on top of the cake, hence the name :) Looking at the pics I have taken, Shyma chechi (The Inconsistent Chef) has baptised this cake as Tequila Sunrise! Thank you chechi once again for this quirky name :)

I'm writing a post on Fondbites Bake Along recipe after a long time, though I have made quite a few recipes after my last bake along post, I never blogged them, just shared the pics on my page and in the group. Anyways, in the original recipe, Subhashini has used Oranges. I have used Clementines (a variety of orange) and Apples. You can use any fruit you like, go ahead and experiment!

Recipe Adapted from: Fondbites
For the Caramel
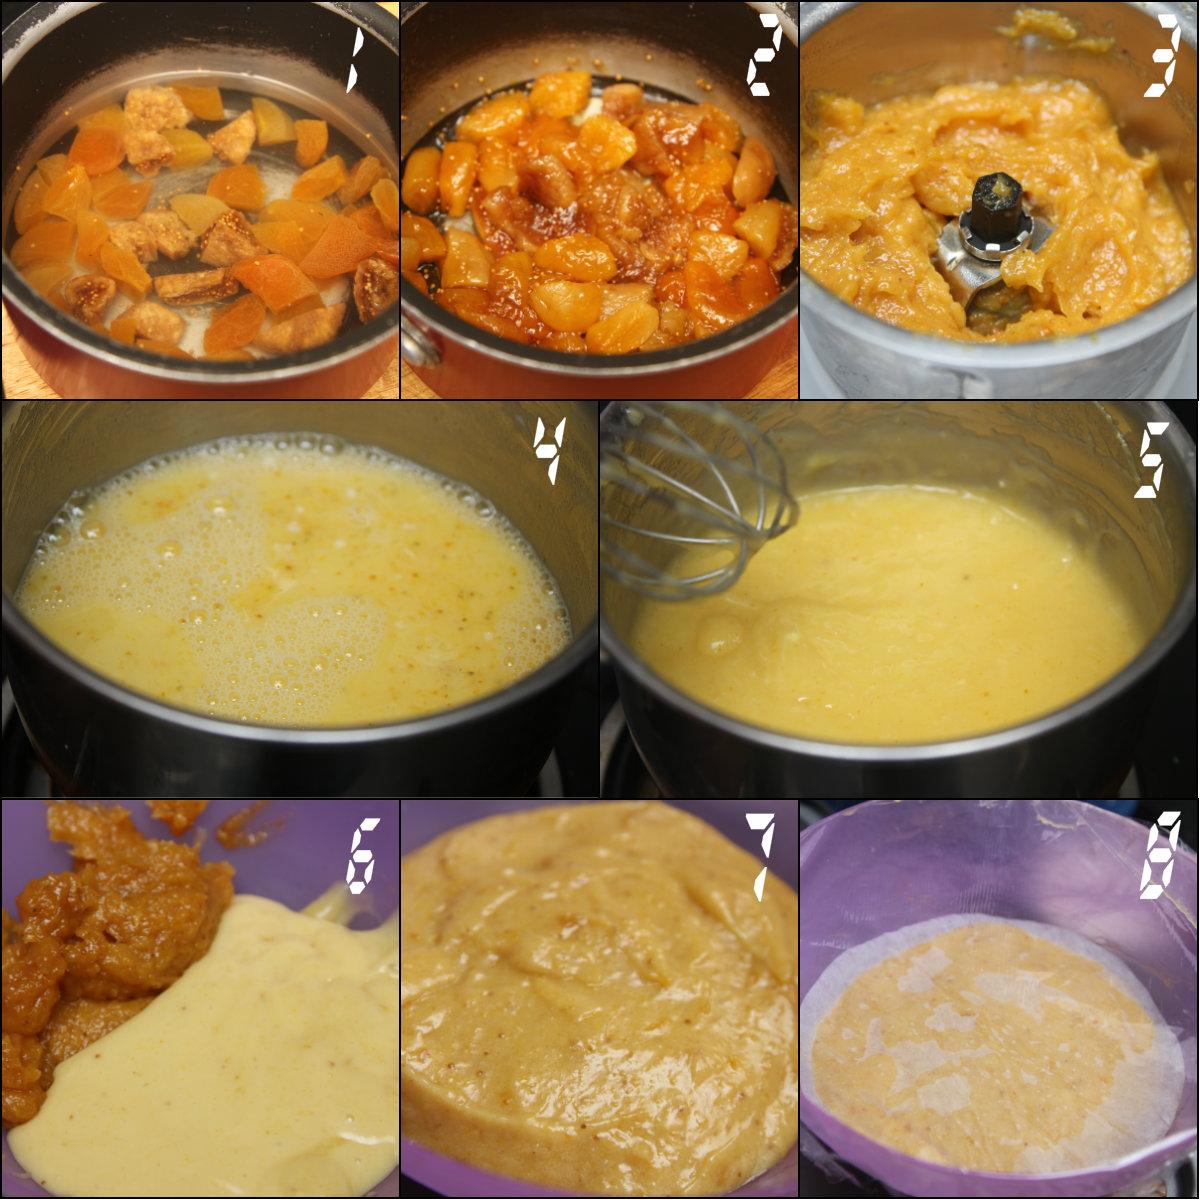
Then make the caramel-
In a heavy bottom saucepan, take the sugar, water, salt and bring it to a rolling boil.
Bring down the flame to low and keep swirling the pan from time to time, do not stir it.
Watch it closely for change in color. Do not leave it unattended at any time.
After a while the color of the syrup will slowly start changing to amber. Once the color reaches a deep amber, remove the pan from the stove before the first whiff of smoke, else the caramel will be a little bitter. (I like my caramel a bit dark so I did take it a bit further than necessary.)
Add the butter and whisk it in briskly and immediately pour it and swirl it around in the pan to coat the entire bottom. Be quick but careful.
Set the pan(s) aside.

Peel and slice the apple into thin wedges.
Peel the oranges like you would the apple, remove the bitter pith, deseed them as you go and slice them into wedges too
Arrange the fruit wedges to your mind's liking, on top of the caramel in the pan.
Once done, butter the sides of the pan and line the sides with butter paper too. (I couldn't line the sides of the pie pan and I'm guessing that's the reason a portion of the cake got stuck to the pan and did not come out cleanly.)

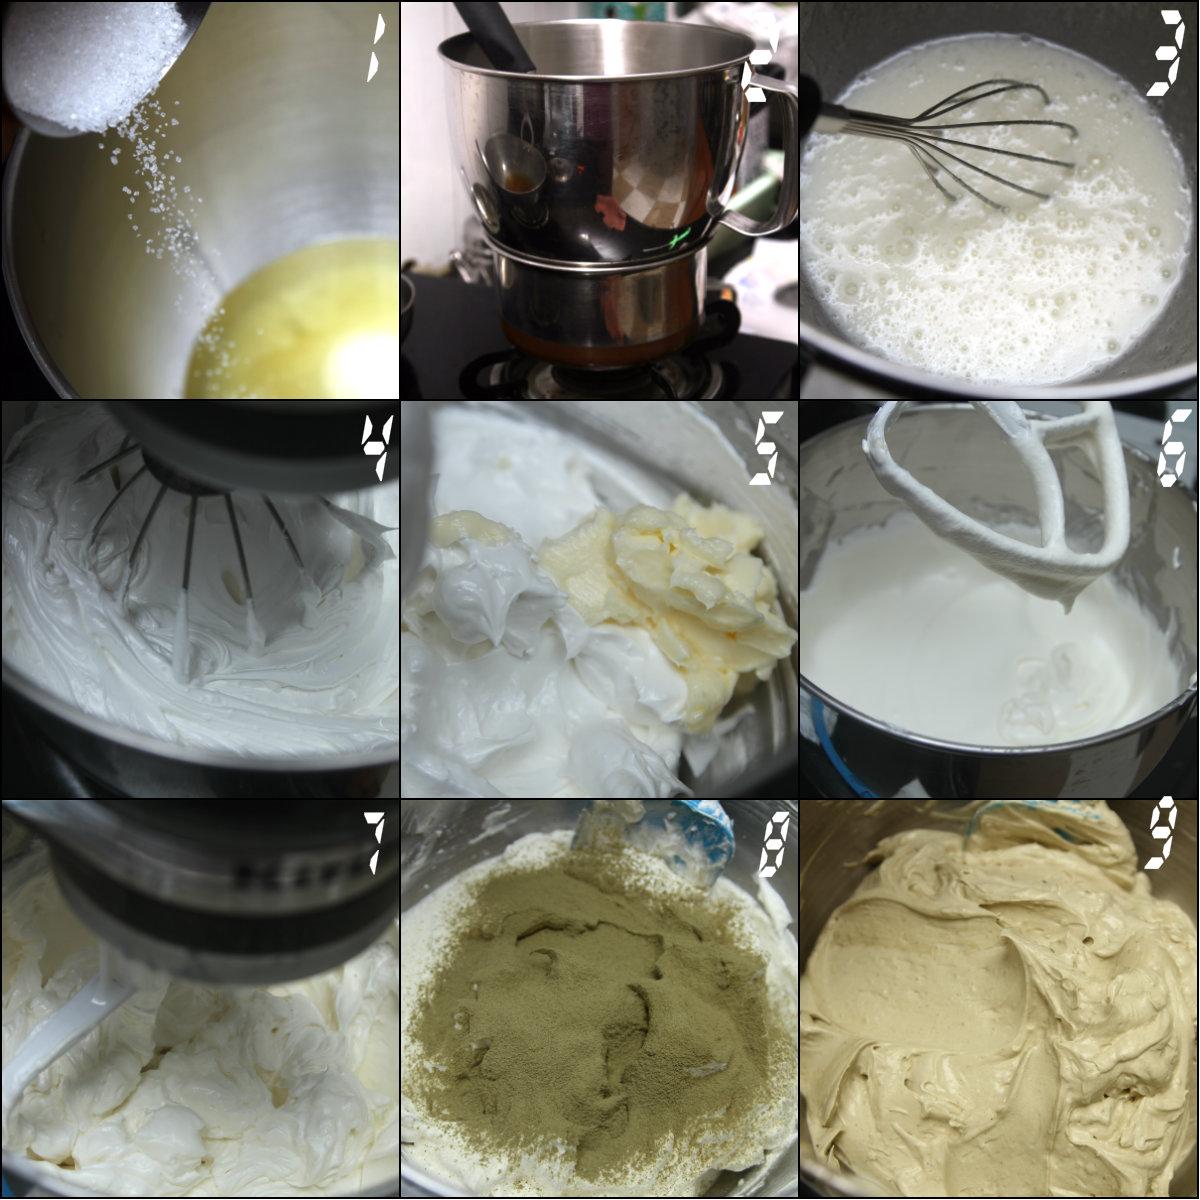
Now on to the making of the cake:
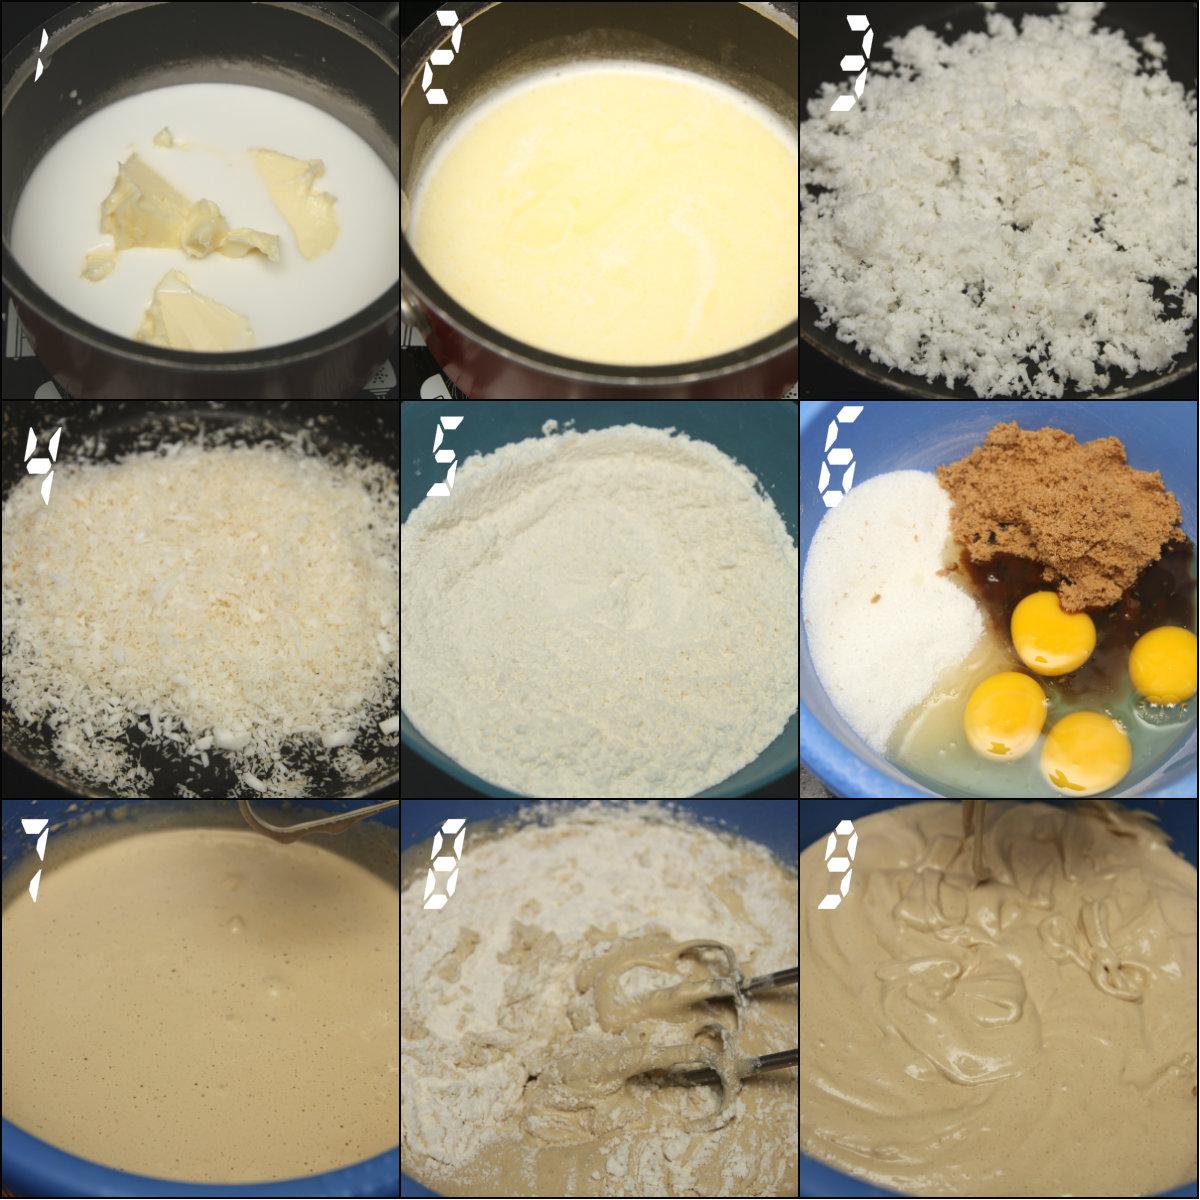
Whisk together the flour, baking powder & soda, salt and almond flour/meal in a bowl and set aside.
Add the butter and castor sugar in the bowl of your electric mixer and beat in medium-hi speed for about 5 mins until the mixture is pale, creamy and fluffy.
Add the eggs one at a time, beating for 1 min after each addition. Scrape the sides and bottom of the bowl as and when necessary.
Add the orange zest and vanilla extract and beat until well combined.
Add the dry ingredients in 3 parts, alternating in between with the milk in 2 parts. Always start and end with the dry ingredients. So it goes, Flour-Milk-Flour-Milk-Flour.
Beat on low speed after each addition, only until its well incorporated. Do not overbeat.
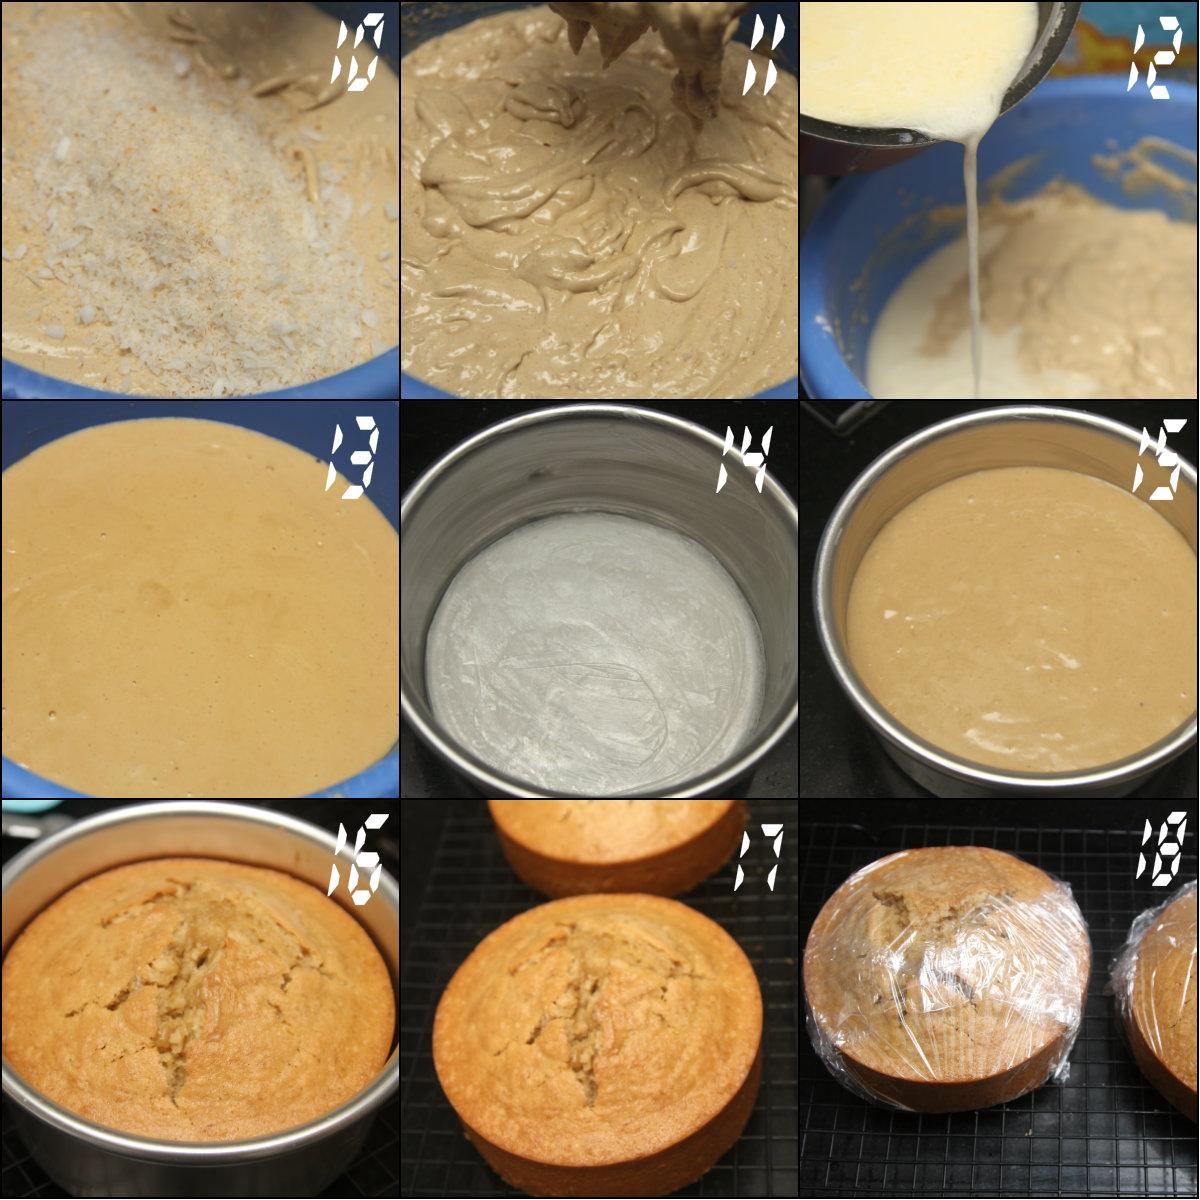
Scoop the batter evenly on top of the fruit wedges in the pan and gently smooth it out using a spatula. Be careful not to move or disturb your fruit arrangement at the bottom while doing so.
I have seen so many upside down cakes doing the rounds and it intrigues me every time but somehow never made one myself. So when this cake was chosen for one of the bake-alongs I was convinced to bake it. These are the kinda cakes that need no frosting. The sweetness is provided by caramel, on top of which the fruits are arranged. The batter is scooped up on top of the fruits and baked. Once baked, the pan is turned and the caramel soaked fruits are on top of the cake, hence the name :) Looking at the pics I have taken, Shyma chechi (The Inconsistent Chef) has baptised this cake as Tequila Sunrise! Thank you chechi once again for this quirky name :)
I'm writing a post on Fondbites Bake Along recipe after a long time, though I have made quite a few recipes after my last bake along post, I never blogged them, just shared the pics on my page and in the group. Anyways, in the original recipe, Subhashini has used Oranges. I have used Clementines (a variety of orange) and Apples. You can use any fruit you like, go ahead and experiment!
I baked the recipe in 2 pans- an 8" pie pan and a 6" cake pan with a removable bottom.
A few points to keep in mind-
*You SHOULD grease your pans and line them with baking paper and grease that also generously.
*If you are using a pan with a removable bottom, place it on a baking sheet because the caramel tends to seep out of the gap. Though it is not really a problem to use these pans, I suggest not to just so that you don't waste some of that gorgeous caramel.
*While making the caramel, once the butter is added, immediately pour it in the prepared pan(s) and swirl it to coat the entire base because the caramel starts setting very fast.
*Check Subhashini's original recipe for more tips and step by step pics. (link below)
*Check Subhashini's original recipe for more tips and step by step pics. (link below)
Recipe Adapted from: Fondbites
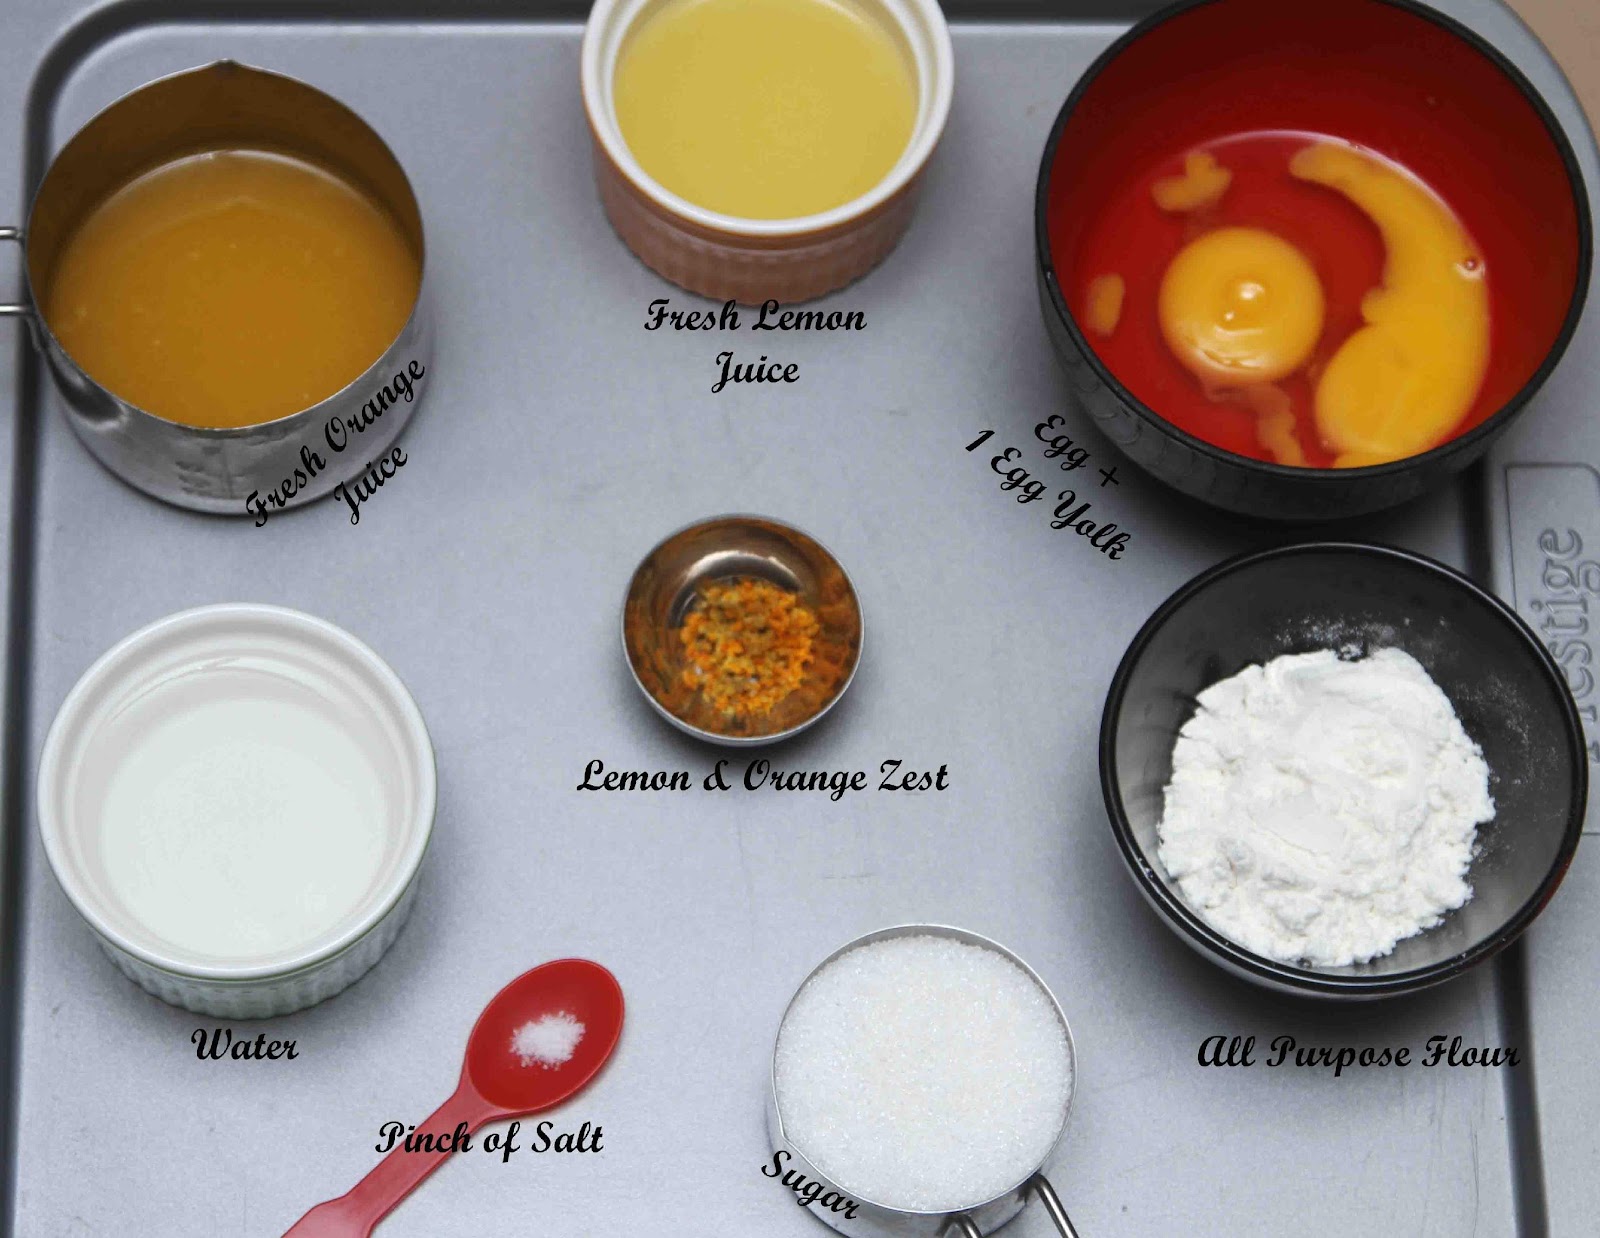
Ingredients:
For the Caramel
Granulated Sugar- 2/3 Cup + 2 Tblsp
Water - 1/3 Cup
Salt - 1/2 Tsp
Butter - 1 Tblsp
For the Cake
Oranges - 2 Large
Apple - 1 Medium
Unsalted Butter - 1/2 Cup or 115 g
Castor Sugar - 2/3 Cup
Eggs - 2
All Purpose Flour - 1 1/4 Cup
Almond Meal - 1/2 Cup
Baking Powder - 3/4 Tsp
Baking Soda - 3/4 Tsp
Salt - 1/4 Tsp
Milk - 1/2 Cup
Vanilla Extract - 1/2 Tsp
Vanilla Extract - 1/2 Tsp
Zest Of 1 Orange
Recipe:
First get your pans ready by greasing the bottoms, lining them and greasing the butter paper.
Then make the caramel-
In a heavy bottom saucepan, take the sugar, water, salt and bring it to a rolling boil.
Bring down the flame to low and keep swirling the pan from time to time, do not stir it.
Watch it closely for change in color. Do not leave it unattended at any time.
After a while the color of the syrup will slowly start changing to amber. Once the color reaches a deep amber, remove the pan from the stove before the first whiff of smoke, else the caramel will be a little bitter. (I like my caramel a bit dark so I did take it a bit further than necessary.)
Add the butter and whisk it in briskly and immediately pour it and swirl it around in the pan to coat the entire bottom. Be quick but careful.
Set the pan(s) aside.
Peel and slice the apple into thin wedges.
Peel the oranges like you would the apple, remove the bitter pith, deseed them as you go and slice them into wedges too
Arrange the fruit wedges to your mind's liking, on top of the caramel in the pan.
Once done, butter the sides of the pan and line the sides with butter paper too. (I couldn't line the sides of the pie pan and I'm guessing that's the reason a portion of the cake got stuck to the pan and did not come out cleanly.)
Now on to the making of the cake:
Whisk together the flour, baking powder & soda, salt and almond flour/meal in a bowl and set aside.
Add the butter and castor sugar in the bowl of your electric mixer and beat in medium-hi speed for about 5 mins until the mixture is pale, creamy and fluffy.
Add the eggs one at a time, beating for 1 min after each addition. Scrape the sides and bottom of the bowl as and when necessary.
Add the orange zest and vanilla extract and beat until well combined.
Add the dry ingredients in 3 parts, alternating in between with the milk in 2 parts. Always start and end with the dry ingredients. So it goes, Flour-Milk-Flour-Milk-Flour.
Beat on low speed after each addition, only until its well incorporated. Do not overbeat.
Scoop the batter evenly on top of the fruit wedges in the pan and gently smooth it out using a spatula. Be careful not to move or disturb your fruit arrangement at the bottom while doing so.
Bake in a 180*C preheated oven for 25 minutes (the time may vary according to your pan size, so check accordingly) or until a tooth pick inserted in the centre of the cake comes out clean.

Cool on a wire rack for 10-15 mins and while its still warm, carefully invert the cake onto your cake board or serving plate.
Ta-da!! The yummiest upside down cake is ready!!! Look how glorious the caramel looks..

The cake by itself tastes so yumm and the texture is so nutty because of the almond meal. You cannot stop with one slice, I guarantee that! Try this recipe with other fruits like sweet lime, pear, peach, etc. You will not be disappointed..

So while I try to tackle a few of the books I have lined up to read, you try this Tequila Sunrise and let me know how it works out for you.. Until next time.. Keep smiling :)
This has been baked for Fondbites, Bake Along, a group of enthusiastic bakers who bake one recipe every week.
Ta-da!! The yummiest upside down cake is ready!!! Look how glorious the caramel looks..
The cake by itself tastes so yumm and the texture is so nutty because of the almond meal. You cannot stop with one slice, I guarantee that! Try this recipe with other fruits like sweet lime, pear, peach, etc. You will not be disappointed..
So while I try to tackle a few of the books I have lined up to read, you try this Tequila Sunrise and let me know how it works out for you.. Until next time.. Keep smiling :)
This has been baked for Fondbites, Bake Along, a group of enthusiastic bakers who bake one recipe every week.